Implementing Action Sheets in React Native: Expo vs. Standalone
@expo/react-native-action-sheet and react-native-action-sheet are both libraries designed to display native-style action sheets (bottom sheets with options) in React Native applications. The core difference lies in their dependency on the Expo ecosystem. @expo/react-native-action-sheet is a wrapper specifically built for Expo managed workflows, leveraging Expo's native modules to provide a seamless experience without manual linking. react-native-action-sheet is the underlying community-maintained library intended for bare React Native projects (CLI-based) or ejected Expo apps, requiring manual linking of native iOS and Android code. Both aim to replicate the standard iOS UIAlertController style and Android BottomSheetDialog behavior, but they differ significantly in setup complexity and compatibility with managed workflows.
Npm Package Weekly Downloads Trend
Github Stars Ranking
Stat Detail


Action Sheets in React Native: Expo Managed vs. Bare CLI
When adding action sheets to a React Native app, the choice between @expo/react-native-action-sheet and react-native-action-sheet usually comes down to one architectural decision: Are you using the Expo Managed Workflow? While they share similar APIs for showing options, their installation and native integration paths are completely different. Let's break down how they fit into your project structure.
🏗️ Installation and Native Linking
The most critical difference is how these libraries connect to native code. This decision often dictates your entire build pipeline.
@expo/react-native-action-sheet is designed for the Expo Managed Workflow.
- It uses Expo Config Plugins to automatically inject native code during the pre-build phase.
- You do not touch Xcode or Android Studio files directly.
- Ideal for teams wanting to stay within the Expo ecosystem.
# Install the Expo-specific wrapper
npx expo install @expo/react-native-action-sheet

// No manual linking required. Expo handles it via app.json/config plugins.
react-native-action-sheet is for Bare React Native or Ejected Expo apps.
- It requires manual linking or
react-native link(though manual is preferred for stability). - You must modify
Podfileon iOS andsettings.gradle/build.gradleon Android. - If you try to use this in a pure Managed Workflow without custom config plugins, the build will fail because the native modules won't be found.
# Install the core community library
npm install react-native-action-sheet

# iOS: You must manually run pod install
cd ios && pod install

// Android: Ensure the package is included in settings.gradle
// rootProject.include(':react-native-action-sheet')
🎣 Provider Setup and Context
Both libraries rely on a React Context provider to inject the action sheet logic into your component tree. The implementation looks nearly identical in JavaScript, which is intentional since the Expo package wraps the core logic.
@expo/react-native-action-sheet uses the ActionSheetProvider from the Expo namespace.
- It ensures the context is compatible with Expo's navigation and lifecycle methods.
- Best for apps that might run in Expo Go during development.
// App.js (Expo Managed)
import { ActionSheetProvider } from '@expo/react-native-action-sheet';

export default function App() {
  return (
    <ActionSheetProvider>
      <NavigationContainer>
        <RootStack />
      </NavigationContainer>
    </ActionSheetProvider>
  );
}
react-native-action-sheet uses the ActionSheetProvider from the core package.
- Functionally the same, but relies on the native modules being correctly linked in your bare project.
- If linking is missed, the
showActionSheetWithOptionscall will throw a native module error.
// App.js (Bare CLI)
import { ActionSheetProvider } from 'react-native-action-sheet';

export default function App() {
  return (
    <ActionSheetProvider>
      <NavigationContainer>
        <RootStack />
      </NavigationContainer>
    </ActionSheetProvider>
  );
}
🖱️ Triggering the Action Sheet
Once the provider is set up, consuming the action sheet is identical in both packages. You access the showActionSheetWithOptions method via the useActionSheet hook. This consistency makes migrating between bare and managed workflows easier if you abstract the hook usage.
Both packages use the same options structure.
- You define
options,cancelButtonIndex, anddestructiveButtonIndex. - The UI adapts automatically to iOS (bottom sheet) and Android (dialog).
// Shared usage pattern for BOTH packages
import { useActionSheet } from '@expo/react-native-action-sheet'; // OR 'react-native-action-sheet'

function MyComponent() {
  const { showActionSheetWithOptions } = useActionSheet();

  const handlePress = () => {
    const options = ['Delete', 'Save', 'Cancel'];
    const cancelButtonIndex = 2;
    const destructiveButtonIndex = 0;

    showActionSheetWithOptions(
      {
        options,
        cancelButtonIndex,
        destructiveButtonIndex,
        title: 'Choose an action',
      },
      (buttonIndex) => {
        if (buttonIndex === 0) console.log('Delete selected');
        if (buttonIndex === 1) console.log('Save selected');
      }
    );
  };

  return <Button title="Open Sheet" onPress={handlePress} />;
}
📱 Platform Behavior and Customization
Both libraries aim to mimic native behavior strictly. They do not try to create a custom JavaScript-based UI unless the native module fails. This ensures high performance and correct accessibility traits on both platforms.
iOS Behavior
- Renders a
UIAlertControllerwith styleactionSheet. - Automatically dims the background.
- Supports title and message headers natively.
Android Behavior
- Renders a
BottomSheetDialogor standardAlertDialogdepending on OS version. - Matches the device's system theme (Light/Dark mode) automatically.
// Both packages support custom styling via options (limited to native capabilities)
showActionSheetWithOptions(
  {
    options: ['Option 1', 'Option 2', 'Cancel'],
    cancelButtonIndex: 2,
    // 'tintColor' works on iOS to change button text color
    tintColor: '#007AFF',
    // 'anchoredView' can be passed on iPad to anchor the sheet
  },
  callback
);
⚠️ Common Pitfalls and Migration
A frequent mistake is installing react-native-action-sheet in an Expo Managed project and wondering why the build crashes. The Expo runtime cannot find the native module because it wasn't injected via the Expo config system.
If you are in Expo Managed:
- ❌ Do NOT install
react-native-action-sheetdirectly unless you write a custom config plugin. - ✅ Use
@expo/react-native-action-sheet.
If you are in Bare/CLI:
- ❌ Do NOT use
@expo/react-native-action-sheetas it adds unnecessary Expo dependencies. - ✅ Use
react-native-action-sheetand verify yourPodfile.
// Incorrect setup in Expo Managed (Will fail on build)
import { ActionSheetProvider } from 'react-native-action-sheet';
// Error: Native module ActionSheetManager not found

// Correct setup in Expo Managed
import { ActionSheetProvider } from '@expo/react-native-action-sheet';
// Works seamlessly with EAS Build and Expo Prebuild
📊 Summary: Key Differences
| Feature | @expo/react-native-action-sheet | react-native-action-sheet |
|---|---|---|
| Target Workflow | Expo Managed Workflow | Bare React Native / Ejected Expo |
| Native Linking | Automatic (via Config Plugins) | Manual (Podfile / Gradle) |
| Expo Go Support | ✅ Yes (Basic functionality) | ❌ No (Requires custom dev client) |
| Dependency | Wraps the core library | Core library |
| Setup Complexity | Low (Install and run) | Medium (Requires native knowledge) |
💡 The Big Picture
These two packages are essentially the same engine in different chassis. react-native-action-sheet is the raw engine meant for developers who build their own car (Bare CLI). @expo/react-native-action-sheet is the same engine pre-installed in a Tesla (Expo Managed), ready to drive out of the box.
Final Recommendation:
- If your
app.jsonexists and you runnpx expo start, stick with@expo/react-native-action-sheet. It saves hours of debugging native build errors. - If you run
npx react-native run-iosand manage your ownPodfile, usereact-native-action-sheetfor a lighter dependency tree and direct control.
How to Choose: @expo/react-native-action-sheet vs react-native-action-sheet
- @expo/react-native-action-sheet:
Choose
@expo/react-native-action-sheetif you are building an app using the Expo Managed Workflow. This package is pre-configured to work with Expo's development client and EAS Build, requiring zero manual native code changes. It is the only safe choice if you want to avoid ejecting or using config plugins manually, ensuring your app remains compatible with Expo Go (for basic testing) and standard Expo updates. - react-native-action-sheet:
Choose
react-native-action-sheetif you are working on a bare React Native project (created via CLI) or have already ejected from Expo. This package gives you direct control over the native implementation but requires you to manually link native dependencies on iOS and Android. Do not use this in a standard Managed Expo workflow unless you are explicitly using custom config plugins to handle the native linking, as it will fail to build otherwise.
Popular Comparisons
README for @expo/react-native-action-sheet
@expo/react-native-action-sheet



React Native Action Sheet is a cross-platform React Native component that uses the native UIActionSheet on iOS and a pure JS implementation on Android.
| iOS | Android | Web |
|---|---|---|
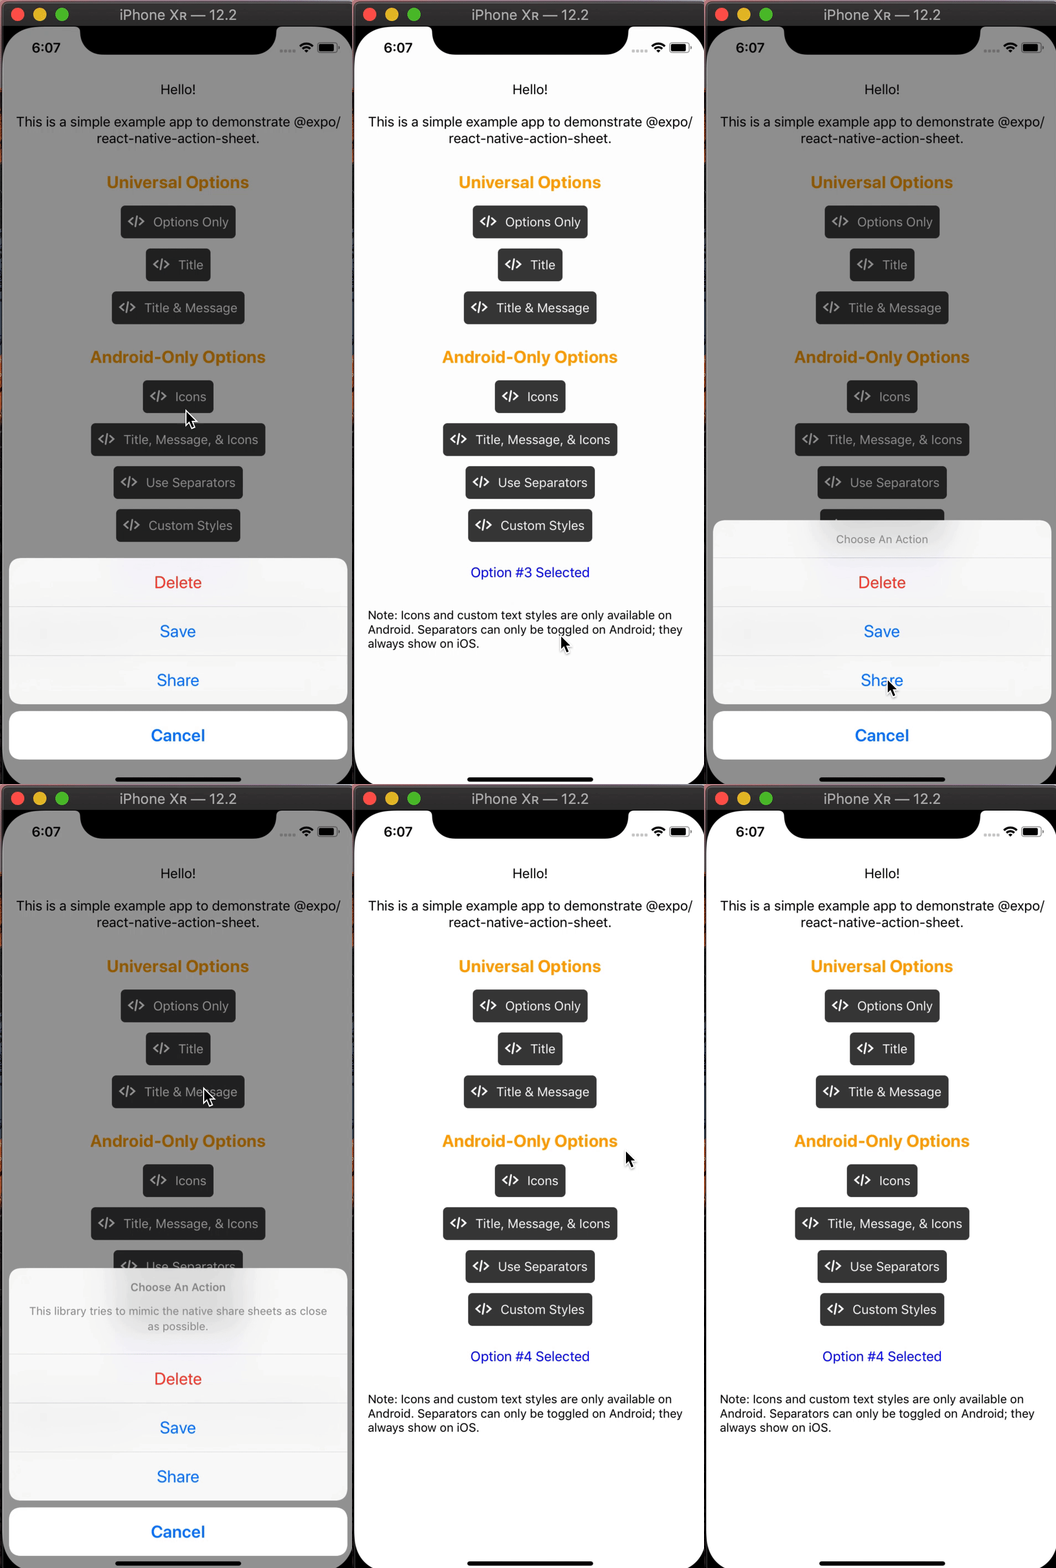 | 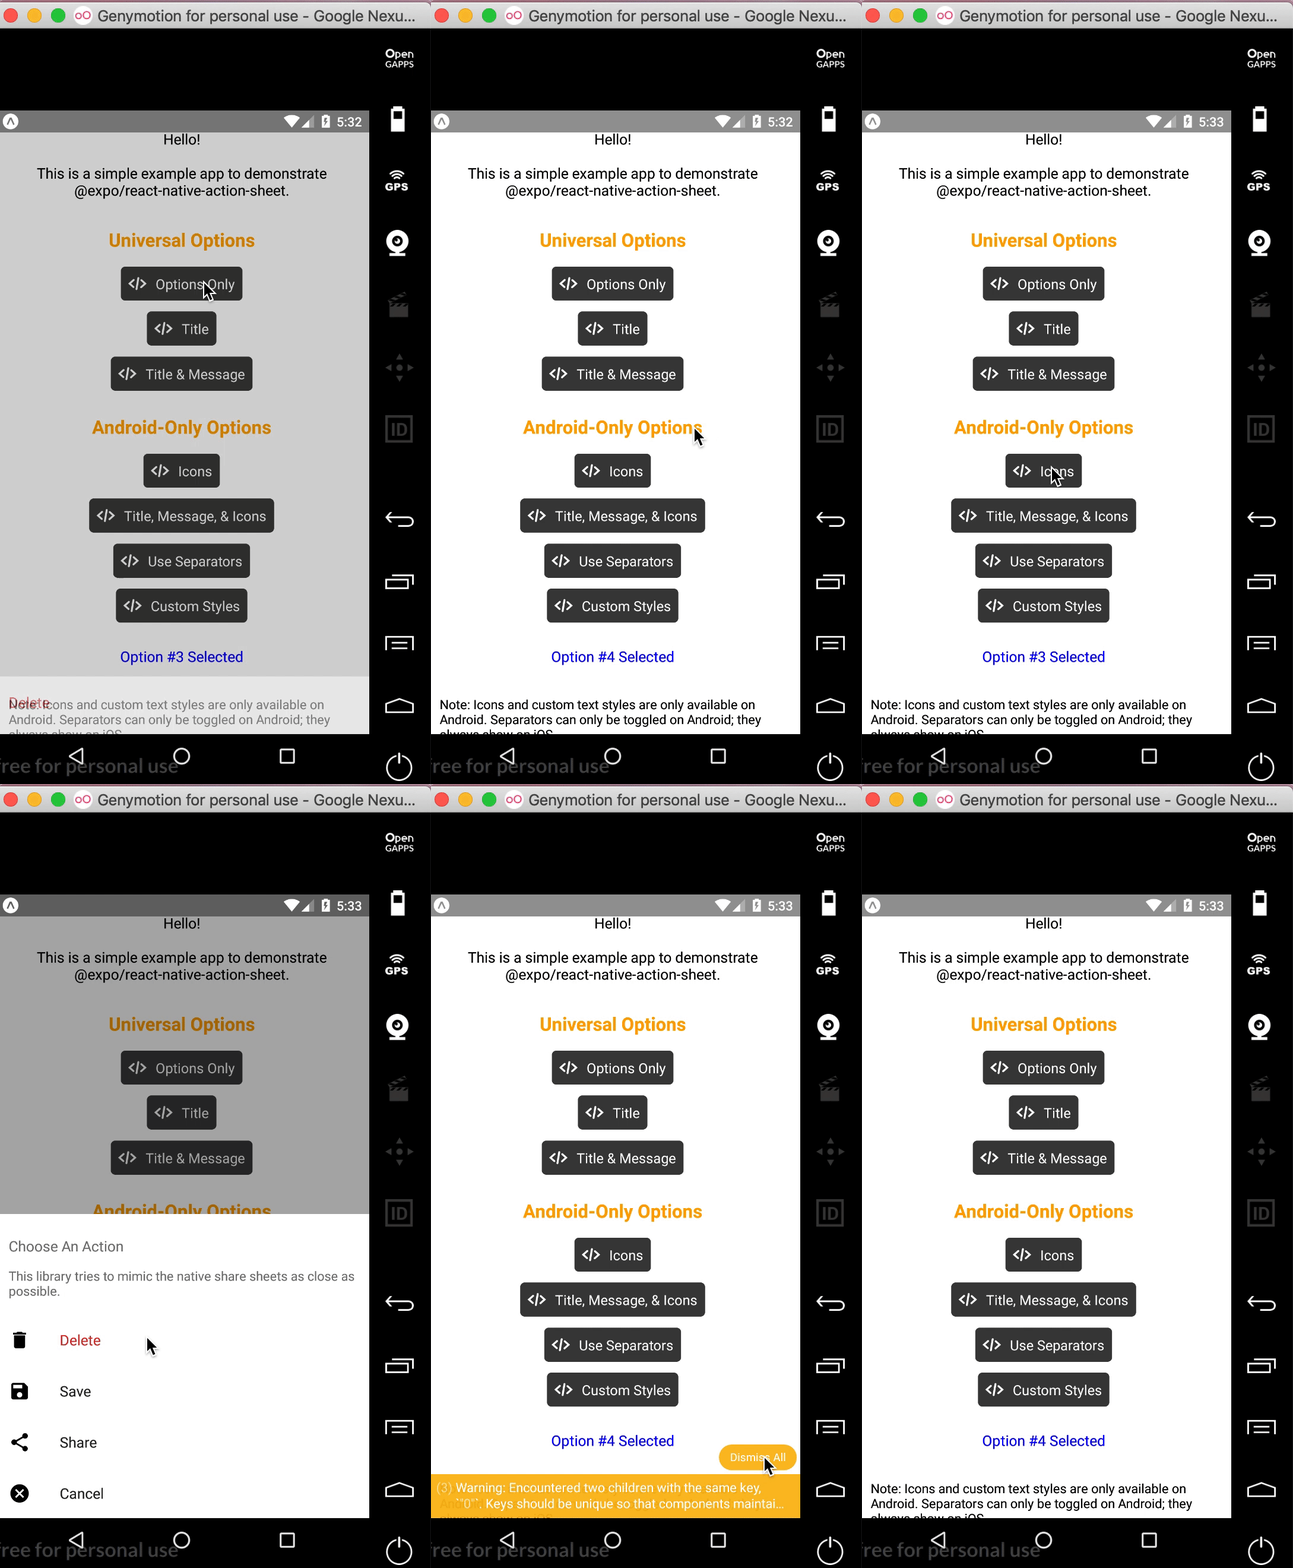 | 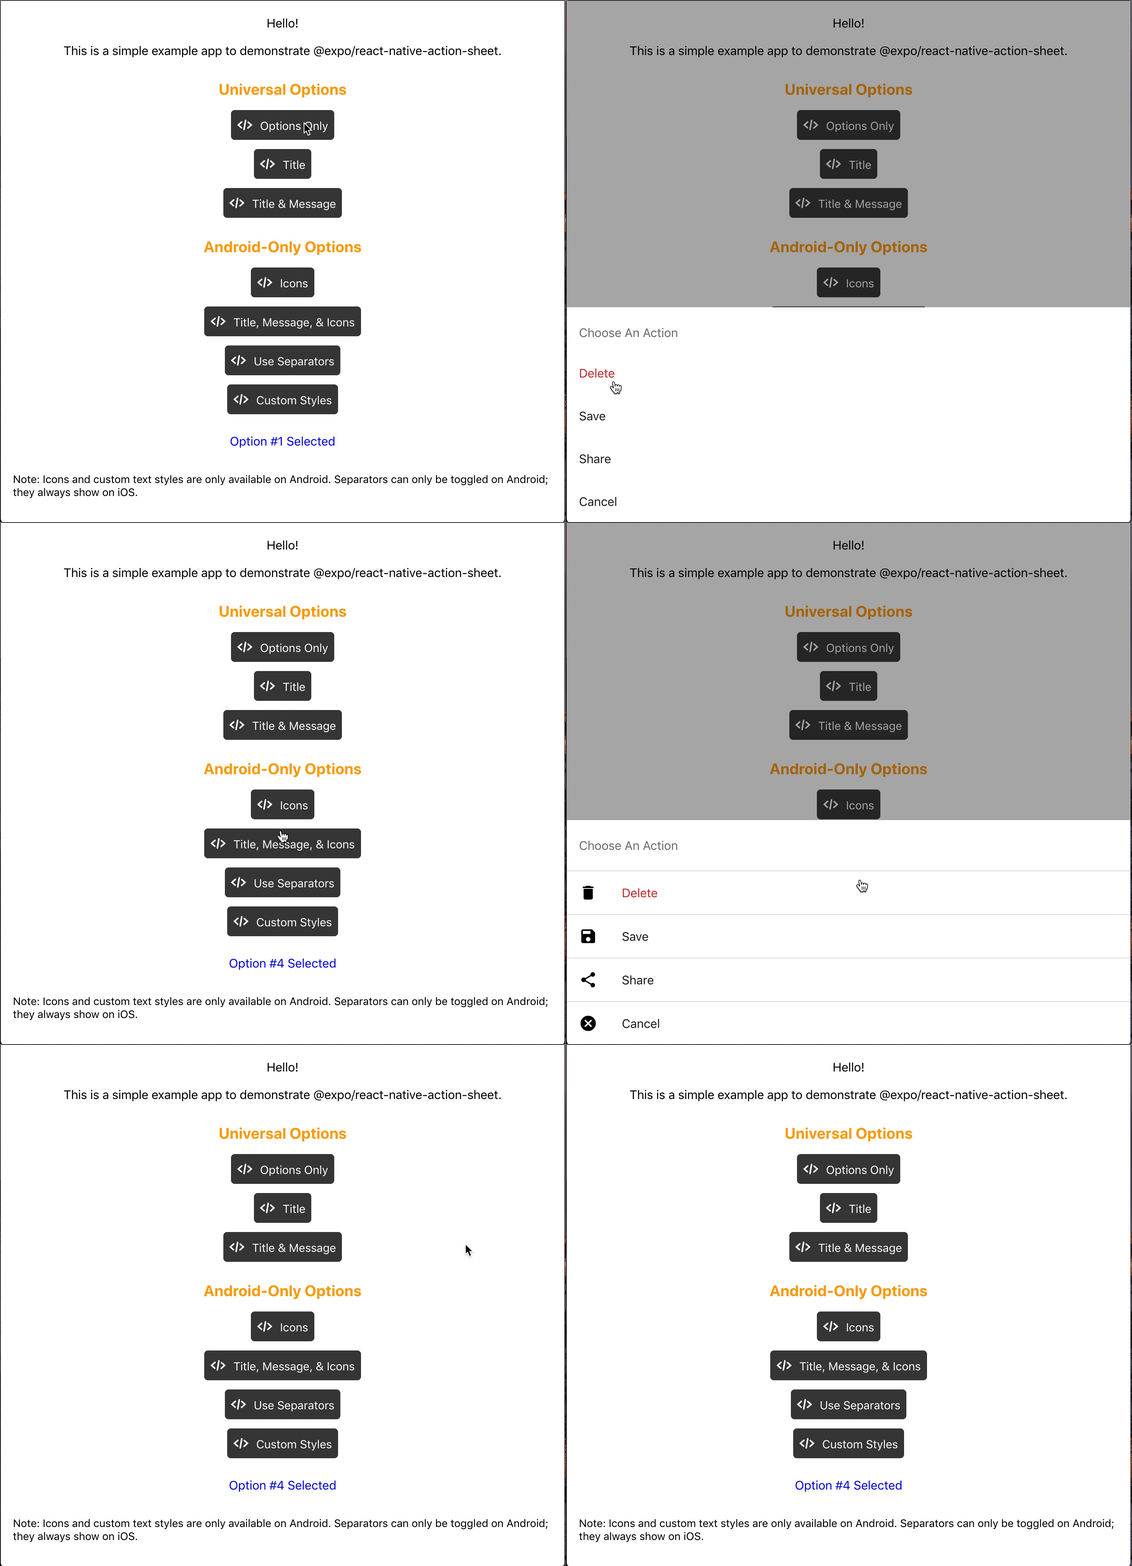 |
Check out the example snack here!
Installation
npm install @expo/react-native-action-sheet
or
yarn add @expo/react-native-action-sheet
A basic ActionSheet Setup
1. Wrap your top-level component with <ActionSheetProvider />
ReactNativeActionSheet uses React context to allow your components to invoke the menu. This means your app needs to be wrapped with the ActionSheetProvider component first.
import { ActionSheetProvider } from '@expo/react-native-action-sheet';

export default function AppContainer() {
  return (
    <ActionSheetProvider>
      <App />
    </ActionSheetProvider>
  );
}
2. Call the showActionSheetWithOptions method with a hook or a higher order component.
// Using the provided hook
import { useActionSheet } from '@expo/react-native-action-sheet';

export default Menu() {
  const { showActionSheetWithOptions } = useActionSheet();

  const onPress = () => {
    const options = ['Delete', 'Save', 'Cancel'];
    const destructiveButtonIndex = 0;
    const cancelButtonIndex = 2;

    showActionSheetWithOptions({
      options,
      cancelButtonIndex,
      destructiveButtonIndex
    }, (selectedIndex: number) => {
      switch (selectedIndex) {
        case 1:
          // Save
          break;

        case destructiveButtonIndex:
          // Delete
          break;

        case cancelButtonIndex:
          // Canceled
      }});
  }

  return (
    <Button title="Menu" onPress={onPress}/>
  )
};
Alternatively, any component can use the higher order component to access the context and pass the showActionSheetWithOptions as a prop.
// Using a Higher Order Component to wrap your component
import { connectActionSheet } from '@expo/react-native-action-sheet';

function Menu({ showActionSheetWithOptions }) {
  /* ... */
}

export default connectActionSheet(Menu);
Menu component can now access the actionSheet prop as showActionSheetWithOptions.
Options
The goal of this library is to mimic the native iOS and Android ActionSheets as closely as possible.
This library can also be used in the browser with Expo for web.
Universal Props
| Name | Type | Description |
|---|---|---|
options | array of strings | A list of button titles (required) |
cancelButtonIndex | number | Index of cancel button in options |
cancelButtonTintColor | string | Color used for the change the text color of the cancel button |
destructiveButtonIndex | number or array of numbers | Indices of destructive buttons in options |
title | string | Title to show above the action sheet |
message | string | Message to show below the title |
tintColor | string | Color used for non-destructive button titles |
disabledButtonIndices | array of numbers | Indices of disabled buttons in options |
iOS Only Props
| Name | Type | Description |
|---|---|---|
anchor | number | iPad only option that allows for docking the action sheet to a node. See ShowActionSheetButton.tsx for an example on how to implement this. |
userInterfaceStyle | string | The interface style used for the action sheet, can be set to light or dark, otherwise the default system style will be used. |
Custom Action Sheet Only (Android/Web) Props
The below props allow modification of the Android ActionSheet. They have no effect on the look on iOS as the native iOS Action Sheet does not have options for modifying these options.
| Name | Type | Description |
|---|---|---|
icons | array of required images or icons | Show icons to go along with each option. If image source paths are provided via require, images will be rendered for you. Alternatively, you can provide an array of elements such as vector icons, pre-rendered Images, etc. |
tintIcons | boolean | Icons by default will be tinted to match the text color. When set to false, the icons will be the color of the source image. This is useful if you want to use multicolor icons. If you provide your own nodes/pre-rendered icons rather than required images in the icons array, you will need to tint them appropriately before providing them in the array of icons; tintColor will not be applied to icons unless they are images from a required source. |
textStyle | TextStyle | Apply any text style props to the options. If the tintColor option is provided, it takes precedence over a color text style prop. |
titleTextStyle | TextStyle | Apply any text style props to the title if present. |
messageTextStyle | TextStyle | Apply any text style props to the message if present. |
autoFocus | boolean | If true, this will give the first option screen reader focus automatically when the action sheet becomes visible. On iOS, this is the default behavior of the native action sheet. |
showSeparators | boolean | Show separators between items. On iOS, separators always show so this prop has no effect. |
containerStyle | ViewStyle | Apply any view style props to the container rather than use the default look (e.g. dark mode). |
separatorStyle | ViewStyle | Modify the look of the separators rather than use the default look. |
useModal | boolean | Defaults to false (true if autoFocus is also true) Wraps the ActionSheet with a Modal, in order to show in front of other Modals that were already opened (issue reference). |
destructiveColor | string | Modify color for text of destructive option. Defaults to #d32f2f. |
ActionSheetProvider Props
The following props can be set directly on the ActionSheetProvider
| Name | Type | Description |
|---|---|---|
useCustomActionSheet | boolean | iOS only prop that uses the custom pure JS action sheet (Android/Web version) instead of the native ActionSheetIOS component. Defaults to false. |
useNativeDriver | boolean | Windows only option that provides the option to disable the native animation driver for React Native Windows projects targeting Windows 10 Version-1809 ; Build-10.0.17763.0 and earlier. useNativeDriver is supported in Version-1903 and later so if your project is targeting that, you don't need to set this prop. |
// example of using useCustomActionSheet on iOS
export default function AppContainer() {
  return (
    <ActionSheetProvider useCustomActionSheet={true}>
      <App />
    </ActionSheetProvider>
  );
}
Callback
The second parameter of the showActionSheetWithOptions function is a callback for when a button is selected. The callback takes a single argument which will be the zero-based index of the pressed option. You can check the value against your cancelButtonIndex to determine if the action was cancelled or not.
function onButtonPress(selectedIndex: number) {
  // handle it!
}
Try it out
Try it in Expo Snack: https://snack.expo.dev/@expo-action-sheet/example.
Example
See the example app.
Usage
$ cd example
$ yarn

// build simulator
$ yarn ios
$ yarn android

// web
$ yarn web
Development
Setup
$ git clone git@github.com:expo/react-native-action-sheet.git
$ cd react-native-action-sheet
$ yarn
Build
We use bob.
$ yarn build
Lint & Format
// tsc
$ yarn type-check

// ESLint + Prettier
$ yarn lint