Interactive JSON Visualization Components for React
react-json-pretty, react-json-tree, and react-json-view are React components designed to render JSON data in a human-readable, structured format within web applications. They transform raw JavaScript objects or JSON strings into collapsible, syntax-highlighted trees that improve debugging, configuration inspection, and data exploration experiences. While all three serve this core purpose, they differ significantly in customization capabilities, interactivity features, performance characteristics, and maintenance status.
Npm Package Weekly Downloads Trend
Github Stars Ranking
Stat Detail
Interactive JSON Visualization in React: react-json-pretty vs react-json-tree vs react-json-view
When building developer tools, admin interfaces, or debugging utilities, displaying JSON in a readable, structured way is essential. These three React packages solve that problem — but with very different trade-offs in terms of features, maintenance, and use cases. Let’s compare them head-to-head.
⚠️ Maintenance Status: One Is Officially Deprecated
react-json-pretty is deprecated. According to its npm page, it shows the notice: "This package has been deprecated. Use react-json-tree instead." The GitHub repository is archived, and there have been no updates in years. Do not use it in new projects.
react-json-tree and react-json-view are both actively maintained as of 2024, with recent releases and responsive issue tracking.
🛑 If you’re currently using
react-json-pretty, migrate to one of the other two immediately.
🎨 Customization: Render Props vs Built-in Styling
react-json-tree gives you full control via render props. You can customize how keys, values, and labels appear by passing functions.
// react-json-tree: Custom key and value rendering
import JSONTree from 'react-json-tree';

<JSONTree
  data={myData}
  theme={{
    scheme: 'monokai',
    base00: '#272822',
    base0B: '#A6E22E'
  }}
  hideRoot={true}
  keyRenderer={(rawKey, keyPath) => <strong>{rawKey}</strong>}
  valueRenderer={(rawValue, valuePath) => {
    if (typeof rawValue === 'string') {
      return <em>{rawValue}</em>;
    }
    return rawValue;
  }}
/>
react-json-view uses a theme prop with predefined styles (like rjv-default, apathy, monokai) but doesn’t expose render props. You can override CSS variables or pass a custom theme object, but you can’t inject JSX into individual nodes.
// react-json-view: Theme-based styling
import ReactJson from 'react-json-view';

<ReactJson
  src={myData}
  theme="monokai"
  style={{ backgroundColor: '#272822' }}
  collapsed={2} // collapse after 2 levels
/>
react-json-pretty (deprecated) only supported basic syntax highlighting with limited theming:
// react-json-pretty (DO NOT USE)
import JsonPretty from 'react-json-pretty';

<JsonPretty id="json" data={myData} />
✏️ Interactivity: View-Only vs Editable JSON
This is the biggest functional difference.
react-json-tree is view-only. Users can expand/collapse nodes, but cannot edit values.
// react-json-tree: No editing possible
<JSONTree data={config} shouldExpandNode={() => false} />
react-json-view is fully editable by default. Users can:
- Double-click values to edit them
- Add new properties with the
+button - Delete keys with the trash icon
- Reorder arrays
You can disable editing globally or per-node:
// react-json-view: Enable/disable editing
<ReactJson
  src={userConfig}
  onEdit={({ updated_src }) => saveConfig(updated_src)}
  onDelete={({ updated_src }) => saveConfig(updated_src)}
  onAdd={({ updated_src }) => saveConfig(updated_src)}
  enableClipboard={false}
  displayObjectSize={false}
/>
react-json-pretty offered no interactivity beyond collapsible sections — and again, it’s deprecated.
🧩 Data Handling and Validation
react-json-view includes real-time validation during editing. If a user enters invalid JSON (e.g., typing { without closing), it shows a red border and prevents saving until fixed. It also enforces type safety — you can’t turn a string into a boolean unless you explicitly delete and retype.
react-json-tree assumes your data is already valid and makes no attempt to validate or correct it. It renders whatever you pass as data.
Both accept plain JavaScript objects — no need to stringify first.
// Both accept JS objects directly
const data = { name: "Alice", active: true, tags: ["dev", "ui"] };

// react-json-tree
<JSONTree data={data} />

// react-json-view
<ReactJson src={data} />
🖥️ Collapsing Behavior and Performance
All three support collapsing nested objects/arrays, but configuration differs.
react-json-tree uses shouldExpandNode for programmatic control:
<JSONTree
  data={largeData}
  shouldExpandNode={(keyName, data, level) => level < 2}
/>
react-json-view uses collapsed (number of levels to collapse initially):
<ReactJson src={largeData} collapsed={3} />
For large datasets (>10k nodes), react-json-tree tends to perform better because it doesn’t carry the overhead of editing logic. react-json-view’s interactivity comes at a cost — virtualization isn’t built in, so huge JSON blobs may cause lag.
🔌 Event Handling
react-json-view provides detailed callbacks for every user action:
<ReactJson
  src={data}
  onEdit={e => console.log('Edited:', e.updated_path, e.new_value)}
  onAdd={e => console.log('Added:', e.namespace, e.new_value)}
  onDelete={e => console.log('Deleted:', e.namespace)}
  onCopy={e => console.log('Copied:', e.src)}
/>
react-json-tree only supports click handlers on labels or values via render props — no built-in edit/add/delete events.
📦 When to Use Which
✅ Use react-json-tree if:
- You need a lightweight, read-only JSON viewer
- You require custom rendering (e.g., linking keys to docs, adding badges)
- You’re building a design system or developer console where consistency matters
- Performance with large data is critical
✅ Use react-json-view if:
- You need an interactive JSON editor
- Your users must modify configurations in-app (e.g., CMS settings, feature flags)
- You want built-in validation and undo/redo (via external state management)
- Clipboard support and object size indicators are useful
🚫 Never use react-json-pretty — it’s deprecated.
💡 Pro Tips
- For read-only + theming:
react-json-treewith a customthemeobject gives you pixel-perfect control. - For editing + validation:
react-json-viewsaves weeks of building your own JSON editor. - Avoid editing in production logs: If you’re displaying server responses or logs, stick with
react-json-tree— you don’t want users accidentally mutating debug data. - Bundle impact:
react-json-viewis larger due to its feature set. If you only need viewing,react-json-treeis leaner.
🆚 Summary Table
| Feature | react-json-pretty | react-json-tree | react-json-view |
|---|---|---|---|
| Status | ❌ Deprecated | ✅ Active | ✅ Active |
| Editable | ❌ No | ❌ No | ✅ Yes |
| Custom Rendering | ❌ Limited | ✅ Render props | ❌ Theme-only |
| Validation | ❌ None | ❌ None | ✅ Real-time |
| Event Hooks | ❌ None | ⚠️ Via render props | ✅ onEdit/onAdd/onDelete |
| Best For | — | Read-only viewers | Interactive editors |
🔚 Final Recommendation
If you just need to display JSON nicely — go with react-json-tree. It’s fast, flexible, and battle-tested.
If you need users to edit JSON in the browser — reach for react-json-view. Its rich interaction model is hard to replicate.
And whatever you do — leave react-json-pretty in the past.
How to Choose: react-json-pretty vs react-json-tree vs react-json-view
- react-json-pretty:
Avoid
react-json-prettyfor new projects — it is deprecated and no longer maintained. The npm registry explicitly marks it as deprecated with a message directing users to alternatives. While it provided basic syntax highlighting and collapsible nodes, its outdated dependencies and lack of updates make it unsuitable for modern React applications. - react-json-tree:
Choose
react-json-treewhen you need a lightweight, highly customizable component with fine-grained control over rendering through render props. It's ideal for embedding JSON viewers in design systems or developer tools where consistent theming and custom node rendering (e.g., adding icons or tooltips) are required. However, it doesn't support editing JSON values out of the box. - react-json-view:
Choose
react-json-viewwhen you require an interactive JSON editor with built-in support for modifying values, adding/removing properties, and real-time validation. It's best suited for configuration panels, admin dashboards, or debugging tools where users need to tweak JSON structures directly in the UI. Be aware that its editing capabilities come with higher bundle size and complexity.
Popular Comparisons
README for react-json-pretty
React JSON Pretty
![]()


Introduction
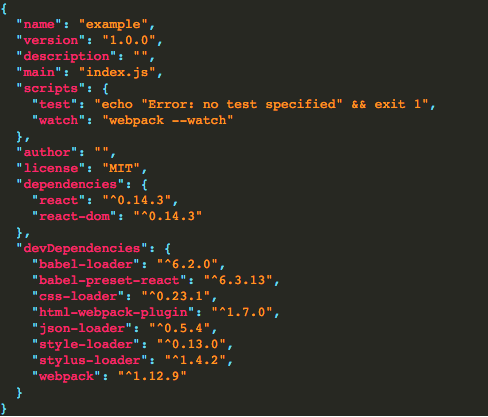
This is a lightweight and tiny react component that helps you to format and prettify the JSON data.
Install
npm install --save react-json-pretty
Usage
Basic
The usage is quite simple, assuming that you already have an application using React. If you don't, visit Facebook React to create one or take a look at the example provided.
Firstly, you need to require the react-json-pretty:
var JSONPretty = require('react-json-pretty');
Or use the es2015 syntax with the help of tools like babel:
import JSONPretty from 'react-json-pretty';
Next, use it in your React component:
<JSONPretty id="json-pretty" data={yourData}></JSONPretty>
Where the property data is the JSON string or just a plain JavaScript object.
Lastly, you can add themes stated below.
Note: if yourData is not a plain object, use circular-json or other similar tools to preprocess it before being passed to JSONPretty.
Themes
Use themes with css-loader and webpack
And also you can import the style to the document, here is an example of using webpack loaders(style!css) to load style, You can visit webpack to get more details:
require('react-json-pretty/themes/monikai.css');
Or
import 'react-json-pretty/themes/monikai.css';
Use themes with theme property
If you don't want to use css, theme property is also available. Properties of theme will be used as style property of the target DOM element.
var JSONPrettyMon = require('react-json-pretty/dist/monikai');
<JSONPretty data={yourJSON} theme={JSONPrettyMon}></JSONPretty>
Visit the example to get some details.
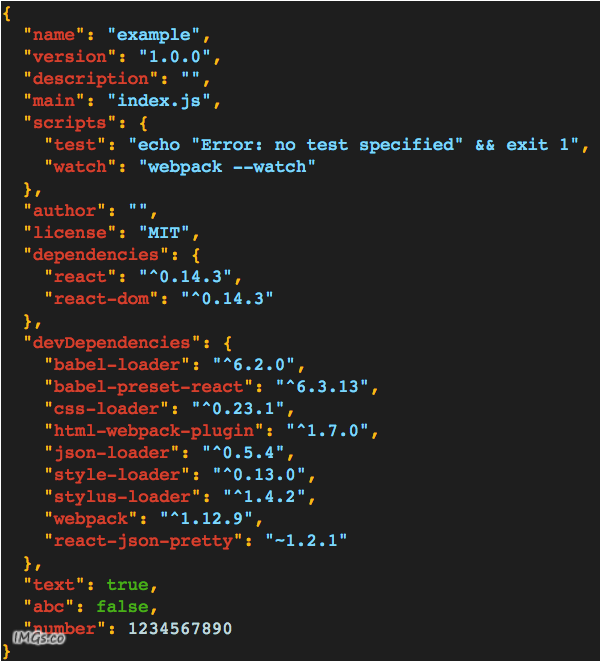
The preview is as below:
Others
Error
Use onJSONPrettyError function property to get JSON.parse errors.
<JSONPretty data={invalid} onJSONPrettyError={e => console.error(e)}></JSONPretty>
Formation
Actually, react-json-pretty is based on JSON.stringify(value[, replacer[, space]]). However, JSON.stringify(value[, replacer[, space]]) has some optional parameters additionally such as replacer and space. This is also available in react-json-pretty.
Here is an example:
<JSONPretty data={yourData} replacer={
    function (key, value) {
        if (key === 'cccc') {
            value += '~~~abc';
        }
        if (key === 'gggg') {
            value *=10;
        }
        return value;
    }
} space="4"
>
</JSONPretty>
Note: The default value for property replacer is null,and space is 2.
You can visit the example to see the details.
Custom themeClassName
Your can also define your custome themeClassName, the default value is __json-pretty__.
Note: this may lead to the usage of default themes provided with css being invalid.
// The final className will be 'custom-json-pretty'
<JSONPretty themeClassName="custom-json-pretty" data={yourData}></JSONPretty>
Custom Themes
There are some default themes provided including "Adventure Time", acai and 1337, to provide users more ready-made options.


All the css theme files are placed in the themes folder.
It is also prossible to define a custom theme:
Using typeStyle property
This can make control the extra styles of the specific type of value:
mainStyle?: string;
keyStyle?: string;
valueStyle?: string;
booleanStyle?: string;
stringStyle?: string;
errorStyle: string;
For example: set padding of the main area and the font size the normal value
<JSONPretty id="json-pretty" style={{fontSize: "1.1em"}} data={youJSON} mainStyle="padding:1em" valueStyle="font-size:1.5em"></JSONPretty>
Using themes property
Here is the property schema:
{
  main?: string,
  error?: string,
  key?: string,
  string?: string,
  value?: string,
  boolean?: string'
}
For example:
{
  main: 'line-height:1.3;color:#66d9ef;background:#272822;overflow:auto;',
  error: 'line-height:1.3;color:#66d9ef;background:#272822;overflow:auto;',
  key: 'color:#f92672;',
  string: 'color:#fd971f;',
  value: 'color:#a6e22e;',
  boolean: 'color:#ac81fe;',
}
Using css file
For example the monokai.styl:
.__json-pretty__
  line-height 1.3
  color rgba(248,248,242,1)
  background #1e1e1e
  overflow auto

  .__json-key__
    color rgba(255,94,94,1)

  .__json-value__
    color rgba(253,176,130,1)

  .__json-string__
    color rgba(233,253,172,1)

  .__json-boolean__
    color rgba(102,153,204,1)

.__json-pretty-error__
  line-height 1.3
  color rgba(248,248,242,1)
  background #1e1e1e
  overflow auto